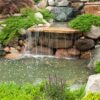
Most pond owners are gradually developing the hobby of rearing ducks but the most important thing which came to their mind is how to build a duck pond? Ducks are creatures that will naturally make themselves at home in any form of water they can find. But if you choose to build a pond for your ducks, here are the various stages it takes to build one;
PLANNING TO BUILD A DUCK POND
Planning the whole thing before starting is significant. Firstly you need to draw up a plan of the project taking into account every factor involved in creating the duck pond. Factors such as;
- Time it takes: Building a 1,000-gallon pond would require at least 70 hours of human labor, with about 3 laborers on site.
- Money needed: Planning a duck pond also involves putting into consideration the amount of money needed for the project. For a 1,000 gallon pond, at least, $500-$1000 should be made available at hand, to alienate any form of inconvenience that may arise during the building of the pond.
- Effort: To DIY a duck pond is easy, but the required manpower is very tasking. Hiring a laborer to work on your pond is an option, especially when you lack the adequate strength for a stressful activities.

SELECTING A LOCATION
A stable temperature is a factor when deciding a location to create your duck pond. Avians can survive the worst climate, but, an unexpected climate change will hurt them as they are quite sensitive creatures.
A stable climate is one significant factor in deciding on a location, especially during the winter, the weather should not be lower than 200F. A temperature below that will cause the ducks to frostbites.
After finding a good area to create your duck pond, you should ensure the environment is covered with mulch and wood chips. When the pond is finished, this covering would ensure a muddy mess by the ducks is not created.
PREPARATION TO BUILD A DUCK POND
This aspect just basically involves;
- Marking out pond dimension and specification
- Measuring for liner
Depending on how many ducks you want to rear, your planned specifications will be different. At this point, you have to decide the width, depth, shape, and size of your duck pond. It’s advisable to go for a wider pond than a deeper pond, especially as you’re dealing with ducks.
A depth of 18-24 feet is fine with a 6-8 feet shelf. After that decision, you can roughly use rope, pegs, or flour to define the area.
You should then measure the length and width of the pond once you are satisfied with the shape. It is advisable to add at least twice the planned depth to your measurement to ensure enough liner for construction.

EXCAVATION
Excavation is the most tedious part of building a duck pond. At this point, it is advisable to dig two levels, creating easy entrance and exit points for the ducks. Excavation simply involves the following;
- Grass removal: This is the first step of excavation. It involves the removal of grass and various vegetation.
- Digging out dirt: For you to get the recommended depth for your plant shelf, you have to dig at least 200 mm (for a small pond) of soil. If the quality of soil dug out is good, then it can be used elsewhere in the garden.
- Creating shelf: At this point, you have to decide where the plant shelf will extend and dig out the rest of the pond. In case, you wish to create a shallow area at one part of the pond, then this is not significant.
- Checking levels: You have to ensure that all parts of the pond are level. If there are parts higher than others, it might result in pond accidents for the ducks. To know if the pond is level, you can make use of twines.
- Removal of stones and sticks: Check around the sides and ground of the pond for sharp stones, sticks, or debris that can destroy the liner.
FITTING THE LINER
The previous steps taking are half of the job. The next thing to do is to fit the liner. This includes;
- Add sand (if needed): If the duck pond is still not leveled, now is the perfect time to add sand.
- Spread out sheeting: If you are working alone, then you should employ the use of paving slabs or stone to keep the liner in place. Then, roll out the sheeting to cover the hole for your duck pond.
- Line hole: Anchor the sides of the liner with pavers, whilst, ensuring a centered liner and gradually drape it freely into the hole.
- Fill with water: At this point, you will fill the pond with water, while you gradually ease the sheeting to ensure it fits the contours of the excavation as perfectly as possible. This may result in muddy water but it is not a significant problem at that point.
- Trim the plastic: Once the pond has been filled with water, trim the edges of the liner, maintaining a good quantity to secure it permanently under slabs.

LAYING THE PAVERS TO BUILD A DUCK POND
You can decide to make the paving slabs yourself by mixing weak mortar in the ratio 1:6 (for a small pond), cement to sand. Before you get into this, ensure that the area is clean of any form of dirt.
Without any further preparation, you can lay the paving slabs so long the ground surrounding your duck pond has been leveled. Ensure the area you cleared is wide enough to contain the paving slabs.
You should avoid having any form of soil under the paving slabs. For a small-sized pond, a combination of 250mm times 250mm, 250mm times 500mm, and 500mm times 500mm are recommended.
However, any paving may be used.
BIOFILTER INSTALLATION
After meeting all required prior conditions, you should leave out a small space at one end of the pond. You will then place your bio-filter there – ensure not to have it covered.
Install the bio-filter according to the manufacturer’s manual that comes with the package. Test the filter twice to ensure it processes the whole pond in about 7-9 hours.

DECORATING THE DUCK POND
At this point, you should drain the mud water out of the pond and then refill it with fresh water. You can decorate your pond as you wish. The most common way is by adding plants to the pond. Using plants such as lilies or irises is a fantastic choice.
Adding a waterfall might be a way of decoration but that does not beautify the pond. Although, you can add colorful lights around the pond to make the pond beautiful at night. You can also add toy ducks to the pond.
A neat duck pond generally will look beautiful. Although, don’t spend too expensive on plants as the ducks might feed on them.
NB: There are some other factors to consider when building a duck pond. Factors such as; filtration, aeration, and the cleaning of the pond.


